Table of Contents
- Transforming Windows into Brand Assets
- Understanding Window Perf Fundamentals
- Window Perf Printing and Graphics Options
- Installation Process and Techniques
- Common Challenges and Solutions
- Conclusion and Next Steps
- Frequently Asked Questions
Transforming Windows into Brand Assets
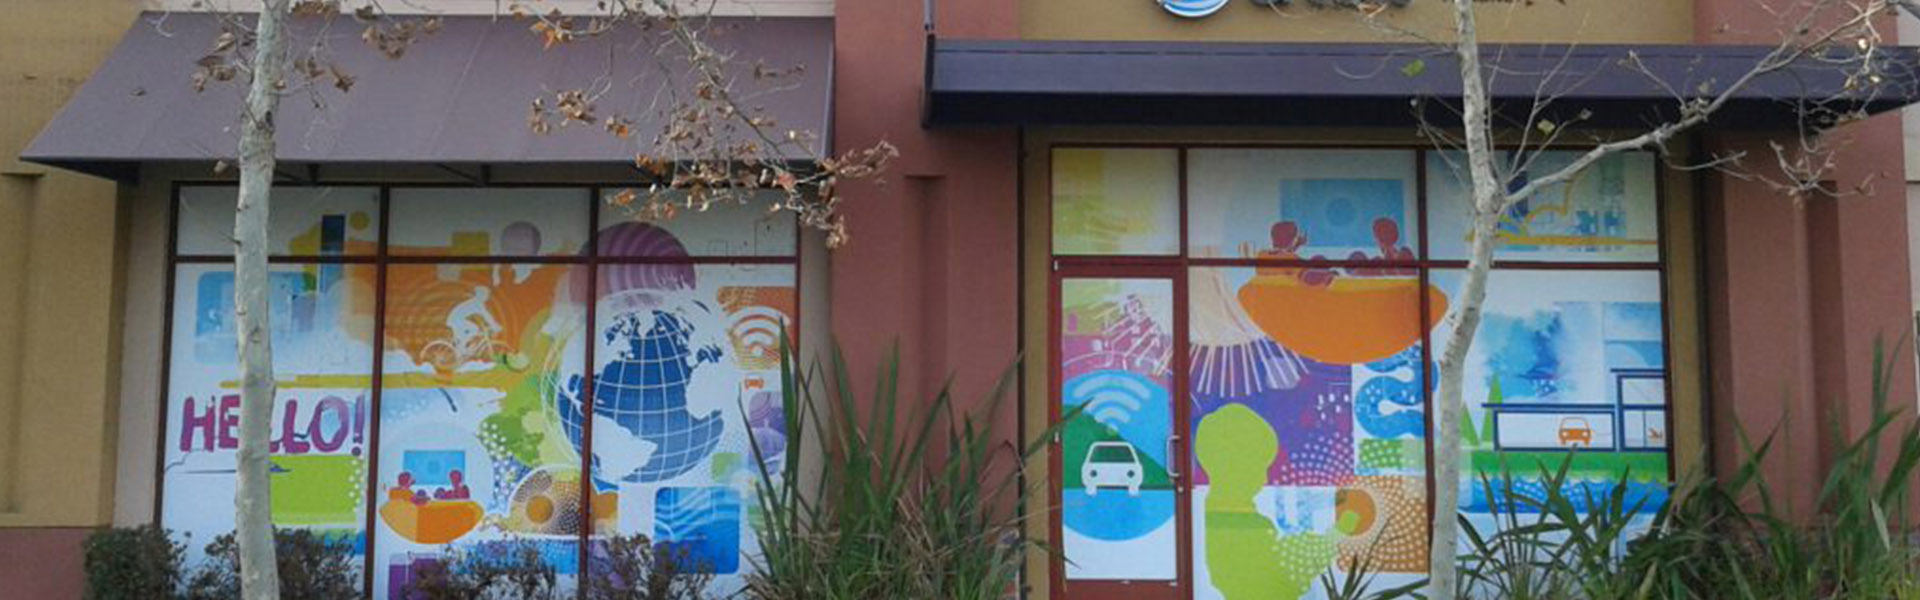
Window perf transforms ordinary glass into powerful marketing space while preserving the view from inside your business. This perforated vinyl window film features thousands of micro-holes punched through a printable face layer with a dark adhesive backing, creating one-way visibility that displays vibrant graphics to passersby while allowing those inside to see out clearly.
This guide covers everything business owners, marketing professionals, and sign installers need to know about perforated window film—from understanding perforation ratios and material options to mastering professional installation techniques. Whether you’re considering window perf for storefronts, office windows, or vehicle graphics, this content provides actionable guidance for maximizing your investment.
Direct answer: Window perf allows exterior graphics while maintaining interior visibility, with 70/30 and 60/40 perforation ratios being the most common choices for balancing graphic impact against see-through capability.
By reading this guide, you will:
- Understand how perforation ratios affect visibility and graphic quality
- Choose between laminated and non-laminated options based on your application needs
- Learn professional installation techniques that prevent common problems
- Maximize the marketing impact and durability of your window graphics
- Navigate material specifications and printing requirements confidently
Understanding Window Perf Fundamentals
Perforated window film is engineered with a precise micro-puncture design that creates the optical illusion of one-way visibility. The film consists of a white printable vinyl face with thousands of small holes (typically 1.4–1.6mm in diameter) backed by a dark adhesive layer. Perforated window film allows for one-way visibility, enabling those inside a building to see out while obscuring the view from the outside. This one side viewing effect is one of the technology’s primary benefits.
The one-way visibility principle works because light intensity differs between inside and outside spaces. When outdoor lighting is brighter than interior lighting, observers inside look through the dark holes toward the light, while those outside see the printed graphics on the solid vinyl portions. This type of film is designed for outdoor use, being resistant to sun, wind, and rain, making it suitable for various environmental conditions.
Perforation Ratios and Visibility Options
The perforation ratio describes the relationship between solid vinyl and open hole area, expressed as vinyl percentage to hole percentage. A 70/30 ratio means 70% printable vinyl surface and 30% open perforations, while 60/40 provides 60% vinyl and 40% holes.
70/30 ratio specifications: This configuration delivers richer, more vibrant graphics with greater color density because more surface area receives ink. The trade-off is reduced interior visibility, making 70/30 ideal for storefronts where outward view is less critical than graphic impact. Optimal viewing conditions include bright outdoor lighting and moderate interior illumination.
60/40 ratio for enhanced interior visibility: Considered the industry standard, 60/40 provides balanced performance for most applications. The larger open area allows more light transmission and clearer outward views, making it suitable for offices, retail spaces, and any application where occupants need good visibility outside.
The connection to graphic opacity and marketing effectiveness is direct: higher vinyl percentages (70/30, 80/20) produce more visually striking graphics but sacrifice transparency. Perforated window film is often used for marketing purposes, allowing businesses to display colorful graphics and messages on their storefronts while maintaining visibility from inside. Your choice depends on whether graphic impact or interior visibility takes priority.
Material Thickness and Durability Factors
Standard perforated window film uses 6 mil thickness (approximately 150 microns), providing sufficient durability for outdoor applications while remaining workable during installation. This thickness balances tear resistance against conformability, making it suitable for flat glass surfaces on storefronts and buildings. Window performance in building materials and energy efficiency refers to how effectively a window controls heat loss, heat gain, air leakage, and natural lighting.
UV protection and fade resistance determine how long your graphics maintain their appearance. Quality window perf products incorporate UV-stable inks and materials rated for 1–3 years of outdoor exposure. Products from manufacturers like Fellers Black Label offer 3-year durability ratings for non-laminated films, while laminated versions extend service life further. Improved window performance helps lower greenhouse gas emissions by reducing the energy required for heating and cooling.
Weather resistance elements include the adhesive system’s ability to withstand temperature fluctuations, moisture, and wind stress without edge lifting or adhesion failure. These durability factors connect directly to your printing and lamination choices, which determine ultimate product longevity.
Window Perf Printing and Graphics Options
Custom printing transforms blank perforated vinyl window film into branded marketing assets using full-color graphics. Modern printing technologies accommodate various ink systems and design requirements, giving businesses flexibility in creating impactful window displays.
Laminated vs Non-Laminated Window Perf
Laminated options for extended outdoor durability: Laminated window perf has a protective layer that adds durability and shields the graphic from environmental elements, making it ideal for long-term installations. The clear overlaminate protects printed surfaces from UV degradation, abrasion, moisture penetration, and dirt accumulation. For vehicle applications or storefronts with high environmental exposure, lamination significantly extends graphic life—often doubling or tripling service duration compared to unlaminated material.
Non-laminated benefits for short-term promotions: Non-laminated window perf is thinner and easier to install for professionals, making it suitable for short-term promotions or locations where protection from the elements is less critical. The lower cost and simpler production process make non-laminated film economical for seasonal campaigns, event marketing, or graphics that will be replaced frequently. Some applications may also evaluate non adhesive display solutions, depending on installation requirements.
Cost considerations and application lifespan differences: While lamination adds material and labor costs, the extended lifespan often justifies the investment. Laminated window graphics tend to be easier to apply due to their added thickness, which can be more forgiving for beginners during installation. For permanent installations expected to last 2+ years, lamination provides better value; for promotions lasting weeks or months, non-laminated film delivers adequate performance at lower cost.
Design Specifications and File Requirements
Print-ready PDF format and resolution requirements: Submit artwork as print-ready PDF files with embedded fonts and images at 150–300 dpi resolution. Vector artwork is preferred for logos, text, and graphics with clean edges, while raster images must be high resolution to maintain clarity when printed at full size.
Custom sizing options for various window dimensions: Most window perf rolls come in widths of 54–60 inches, with custom cutting to match specific window dimensions. Allow bleed margins of at least 0.5 inches beyond final trim size, and account for overlap if multiple panels are needed for large windows. Be sure to verify the quantity add options available before placing large orders.
Color accuracy and four-color process printing: CMYK color space is standard for print production. Because perforations interrupt the printed surface, colors may appear slightly less saturated than on solid vinyl. Proofing is recommended for color-critical applications, and designers should increase contrast to compensate for the visual effect of holes in the printed area.

Brand Options and Material Quality
Trusted manufacturers: Leading brands include 3M (offering cast films like the 8170 P50 with 4 mil thickness and approximately 40% open area), Orafol, and Ultraflex. Eikon’s Imageperfect iD3 provides 70/30 perforation with 3-year durability and compatibility with UV, latex, and solvent printing technologies. The frame material affects thermal resistance, with fiberglass, wood, and vinyl generally insulating better than aluminum.
Quality standards for adhesive strength and removability: Premium window perf features adhesive systems that bond securely to glass without damaging surfaces upon removal. Look for products rated as “removable” or “repositionable” for applications requiring clean removal. Adhesive compatibility with glass coatings and window tints should be verified before application.
These material considerations directly impact installation procedures, as higher-quality films typically install more predictably and maintain performance longer.
Installation Process and Techniques
Professional installation requires proper preparation, appropriate tools, and systematic technique. Even the most efficient window will underperform if improperly installed, potentially reducing efficiency by 10–15% due to gaps and poor sealing—a principle that applies equally to window perf where adhesion failures compromise both appearance and longevity.
Essential Tools and Preparation
Required tools: Gather stainless steel blades (sharp, fresh), squeegees with soft edges in various widths, green painter’s tape for positioning, a spray bottle with application solution (water with mild detergent), 70% isopropyl alcohol, lint-free cloths, and protective gloves.
Window cleaning preparation: Before applying window perf, thoroughly clean the window using 70% isopropyl alcohol to remove any dust, dirt, or oils that could affect adhesion. Pay special attention to edges and corners where residue accumulates. The glass surface must be completely dry before film application.
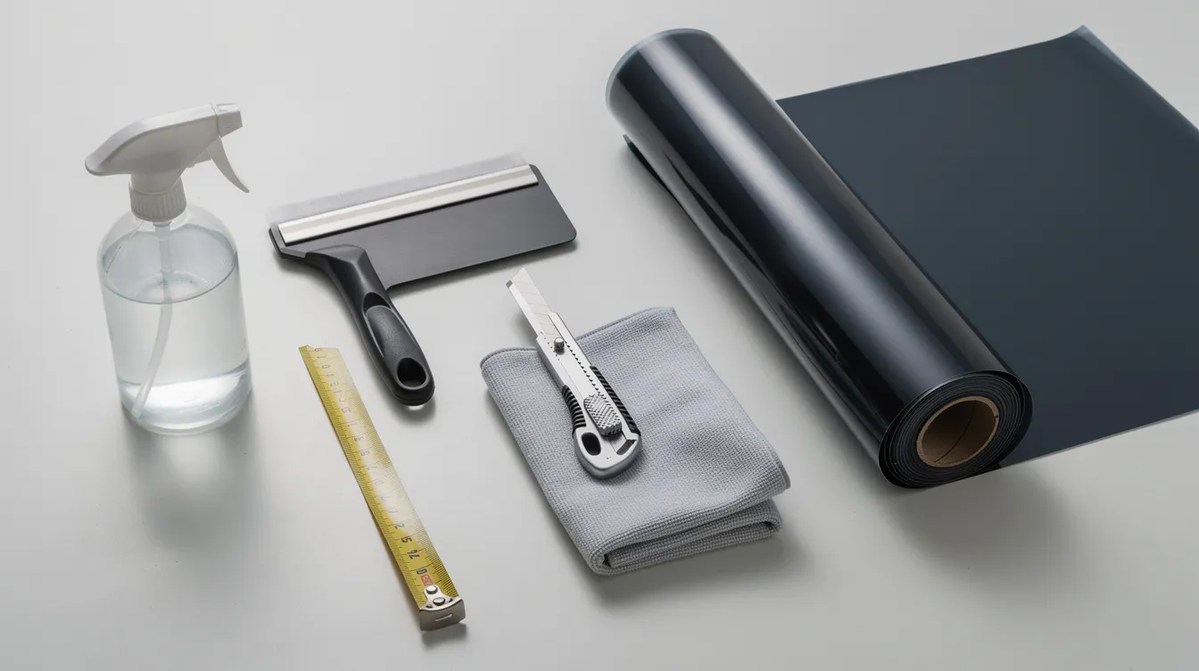
Workspace setup and safety considerations: Work in controlled temperature conditions (ideally 50–90°F) with adequate lighting. For large storefronts, ensure stable ladder or scaffold positioning. Keep the workspace clean to prevent dust or debris from contaminating the adhesive surface during installation.
Step-by-Step Installation Process
Follow these numbered steps for professional results:
- Measure and cut the film slightly oversize (1–2 inches beyond final dimensions) to allow for precise trimming after application.
- Dry fit and position the film against the glass without removing the backing to verify alignment. Use the hinge method: secure one edge with masking tape to create a pivot point for controlled application.
- Apply application solution by spraying the glass surface with slip solution, which allows repositioning and prevents premature adhesion.
- Remove backing gradually starting from the hinged edge, peeling the liner while simultaneously positioning the film against the wet glass. This action helps maintain proper alignment during installation.
- Squeegee from center outward using a squeegee at a 45-degree angle, which helps apply even pressure and prevent air bubbles during the installation of window perf. The Canadian squeegee technique involves starting from the middle of the window and working outward in overlapping strokes to effectively apply window perf without air bubbles.
- Work methodically in overlapping passes, pushing application fluid and trapped air toward the edges. Maintain consistent pressure throughout.
- Trim excess material precisely along window frames. After applying window perf, use a stainless-steel blade to carefully trim any excess material along the edges for a clean, professional finish. Leave a small gap (1–2mm) between film and frame to prevent edge lifting.
- Final squeegee pass along all edges to ensure complete adhesion, then allow adequate curing time (typically 24–72 hours) before cleaning or exposure to moisture.
Installation Comparison by Window Type
| Factor | Storefront Windows | Vehicle Windows | Office Applications |
|---|---|---|---|
| Surface Preparation | Alcohol cleaning; flat surface; minimal complexity | Must address curvature, defroster lines, tint compatibility | Standard cleaning; controlled indoor environment |
| Adhesive Requirements | Semi-permanent or removable; strong bond for weather exposure | Conformable adhesive; heat application may be needed | Standard adhesive; removal capability important |
| Installation Difficulty | Moderate; large size requires multiple installers | High; curves require cast film and heat gun technique | Easier; smaller panels; stable conditions |
| Durability Expectations | 2–3 years laminated; 1 year non-laminated | High wear from weather, car washes; lamination critical | Extended life indoors; minimal environmental stress |
| Maintenance Needs | Gentle cleaning; periodic edge inspection | Regular cleaning; monitor for lifting around seals | Occasional dusting; easy replacement when needed |
Choose materials and techniques appropriate to your specific application type for optimal results and longevity. Double or triple-pane glass is standard for high performance, as the air spaces between panes provide insulation.
Common Challenges and Solutions
Even experienced installers encounter issues during application. Understanding common problems and their solutions helps achieve professional results and extend graphic life.
Air Bubbles and Adhesion Problems
Proper squeegee technique and adequate application solution prevent most bubble formation. If bubbles appear, they often contain trapped fluid rather than air—these typically dissipate as the film cures. For persistent bubbles, carefully pierce with a pin at one edge and press flat with a squeegee. Using a squeegee at a 45-degree angle helps apply even pressure and prevent air bubbles during the installation of window perf.
Adhesion failures usually result from inadequate surface preparation. Ensure glass is thoroughly cleaned and dried and avoid installation in extremely cold or humid conditions that compromise adhesive performance.
Premature Peeling or Edge Lifting
Surface preparation importance cannot be overstated—residual oils, cleaning product films, or dust particles create weak points where lifting begins. Edges experience the highest stress from wind, temperature changes, and physical contact.
Solutions include leaving a slight gap between film and window frame (preventing material from wrapping over edges where it cannot bond properly), ensuring adequate squeegee pressure along all edges, and allowing full adhesive curing time (24–72 hours) before the installation experiences environmental stress or cleaning.
Color Fading and Weather Damage
UV-resistant material selection and lamination provide the best protection against fading. For long-term outdoor installations, specify UV-stable inks during printing and add protective lamination to shield the printed surface.
Avoid aggressive cleaning products or abrasive tools that damage printed surfaces. Mild soap and water with soft cloths protect graphics while maintaining appearance.
Conclusion and Next Steps
Window perf delivers an effective one-way visibility marketing solution that transforms glass surfaces into branded advertising space while maintaining comfortable interior environments. Understanding perforation ratios, material options, and proper installation techniques ensures maximum return on your investment. Visible Transmittance (VT) measures the amount of natural daylight that passes through the window, with higher values indicating more natural light.
Immediate next steps:
- Measure your windows accurately, noting dimensions and any obstructions (handles, frames, sensors)
- Select your perforation ratio based on whether graphic impact or interior visibility takes priority
- Choose between laminated and non-laminated materials based on expected installation duration
- Decide whether to use a professional installer or proceed with DIY installation based on window complexity and your experience level
- Prepare artwork files meeting print specifications (PDF format, 150–300 dpi, CMYK color)
Related topics worth exploring include vehicle window graphics (which require specialized conformable materials and may face regulatory restrictions), building signage regulations in your jurisdiction, and long-term marketing strategies that integrate window graphics with other promotional elements.
Frequently Asked Questions
What is the difference between 70/30 and 60/40 perforation ratios?
The 70/30 ratio provides 70% vinyl surface and 30% holes, delivering richer graphics with greater color density but reduced interior visibility. The 60/40 ratio offers 60% vinyl and 40% holes, which is considered the industry standard for balanced performance between graphic impact and see-through capability. Choose 70/30 for maximum visual impact on storefronts; choose 60/40 when interior visibility matters more.
How long does window perf last outdoors?
Non-laminated window perf typically lasts 1 year outdoors with proper installation. Laminated window perf has a protective layer that adds durability and shields the graphic from environmental elements, making it ideal for long-term installations—often extending life to 2–3 years or longer. Premium products from manufacturers like 3M and Eikon offer 3-year durability ratings.
Can window perf be removed without damaging glass?
Yes, quality window perf products with removable adhesive systems can be removed cleanly without damaging glass surfaces. Apply heat with a heat gun or hair dryer to soften the adhesive, then peel slowly at a low angle. Any residual adhesive can be removed with commercial adhesive remover or isopropyl alcohol. Removal becomes more difficult if film remains installed beyond its rated lifespan.
What tools are essential for professional window perf installation?
Essential tools include stainless steel blades for precise trimming, squeegees with soft edges for application pressure, green painter’s tape for positioning, spray bottles with application solution, 70% isopropyl alcohol for surface cleaning, lint-free cloths, and protective gloves. A heat gun may be necessary for curved applications.
Is laminated window perf worth the extra cost?
For installations expected to last more than 6–12 months, lamination typically provides better value despite higher upfront cost. Laminated window graphics tend to be easier to apply due to their added thickness, which can be more forgiving for beginners during installation. The protective layer extends graphic life, maintains appearance, and protects against weather, UV, and physical abrasion.
How do I clean windows with perforated film installed?
Use mild soap and water with soft, non-abrasive cloths or sponges. Avoid pressure washers, harsh chemical cleaners, or abrasive scrubbing that can damage the printed surface or lift edges. Clean gently in the direction of the perforations rather than against them. Allow the film to cure fully (at least 72 hours) before first cleaning.
What file format is best for custom window perf printing?
Submit artwork as print-ready PDF files with all fonts embedded and images at 150–300 dpi resolution. Use CMYK color space for accurate print color matching. Vector artwork is preferred for logos and text elements. Include bleed margins of at least 0.5 inches beyond trim lines and provide separate files if multiple panels are needed.
Can window perf be applied to curved surfaces?
Yes, but curved applications require cast vinyl films rather than calendared films. Cast vinyl offers superior conformability and dimensional stability for curved surfaces. Installation may require heat application to relax the film and allow it to conform to the curve. Vehicle windows with significant curvature are among the most challenging applications and often benefit from professional installation.
What is condensation resistance?
Condensation resistance is rated on a scale of 1 to 100, indicating how well a window resists moisture buildup.
More Posts: